Showing posts with label pens. Show all posts

Wednesday, 15 August 2012

Candy Cane Stylus

As we may remember I recently had a great prize pack from Timberbits.  In this pack I choose some of their newly stocked Slimline Stylus pen kits.  These are basic Slimline pen kits with a Stylus tip at the clip end for use with Ipad/Smartphones etc.  

I was very keen to turn one of these kits so I teamed it up with a Candy Cane Acrylic that I had picked up in a sale ages ago.


Being a slimline it was a quick kit to turn.  Just drill with a 7mm drill bit, cut in half and glue in the two tubes and trim.  Let the glue dry overnight and turn.
I love acrylics, so much colour and so quick to turn and no CA finish to take up time at the end (or stuff up!)
Acrylics polish up so well.  I usually work through 150 grit wet dry paper to 800 and then bring out the micro mesh pads.  That should have made it nice and smooth and removed any hairline scratches.  Now time to make it shine!  I give an over kill with some Brasso and then car polish, though the car polish is enough.  Then assembly time.
The finished article is great, and the fantastic thing about these kits (found here) is that because the stylus tip fits a 7mm tube it creates many more great possibilities (stay tuned).


Wednesday, 8 August 2012

Timberbits!

OK, so I love playing with wood, and one of my favourite items to make are pens.  Whenever I am in need of pen kits my first port of call is always the Timberbits website.  If I'm honest, I look at this site weekly to see what new stock or specials are on, its always a good time to buy more stuff!  Anyway recently the crew at Timberbits had a Facebook competition, just like their page for a chance to win a $200 gift pack.  Already a follower I made sure I was entered, and then completely forgot about it.  Luckily they did not forget and guess who won?  Yes I was as happy as a wood turner in a forest!


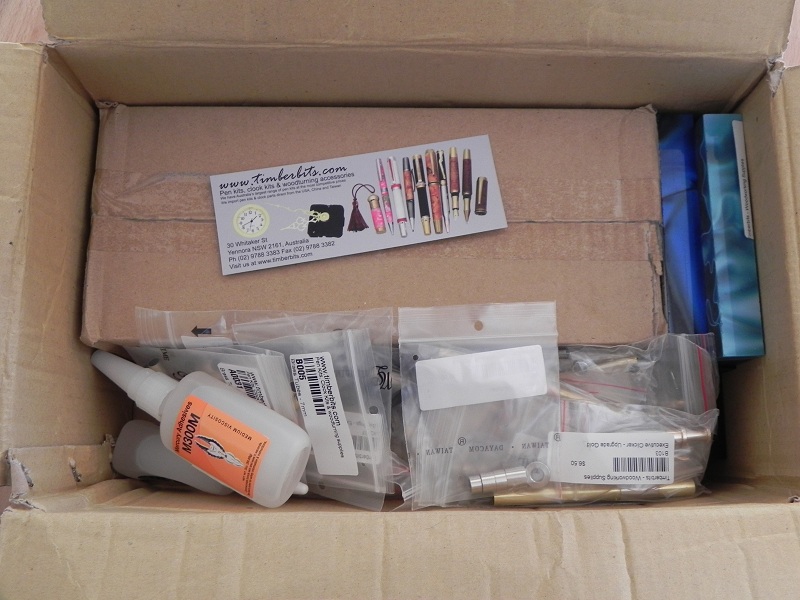
Now the hard part, choosing.  With $200 to play with and Timberbits always low prices you can get a lot of bang for your buck (in this case their buck!).  I only placed my order yesterday but by this morning this was waiting at the post office.  I shouldn't have been surprised, the people their are fantastic and the delivery is always prompt, in fact fantastic service all the time!


I was very keen to get home and see my goodies, as you can see I did manage to squeeze it quite a bit for the money.


Included were Sierra, Streamline, Slimline with stylus nib, Executive clicks and European pen kits.  Add in some new bushes, glue, some great acrylics and a new stand to show off the finished pens and it was a full box.


Now I guess a few of you will look at this and say I'm getting a kick back to write this but no, until I post this they will have no idea.  In this day and age of poor people relations its good to be able to plug a small family business.  I can't wait to go and play with some of these acrylics.  If you are into pen making and wood turning check out the web site www.timberbits.com The service is always great, the prices low (I don't know how he gets them so low) and the postage rate fantastic even overseas. 

Where do you get great service?

Friday, 27 July 2012

Sydney timber and working with wood show

I woke up like a kid on Christmas morning today, why?  Yes it was the Sydney Timber and Working with Wood Show.  So much possibility lay ahead.  I have been looking forward to this event since my first visit last year, and hiding some cash away too.

This was the first year in a new venue at Sydney Olympic Park. There was great parking and a large cue to get in, but after the wait it was great to get it.  If you are into timber and tools, this is the place to be.


My first port of call was to look at the exhibitions of the fantastic and far too talented work of the wood turners out there.  I am blown away at how clever they are, and how much I have to learn.


One piece of equipment that really caught my were the lathes of the ornamental turns group.  They are something I had never seen before but something I will need to set my father upon.


After checking out the displays it was time to flex the cash and if need be the credit card (and yes, it was needed!).  There were of course stands from the leading wood shops, tool makers, and suppliers.  I was especially keen to check out the Arbortech stand and look at the carving tools.


There was also a great stand from Timberbits with some fantastic examples of Davids pens.


And of course there was plenty of wood in all shapes, sizes and varieties.


Some of the Red Mallee burls even managed to find their way home with me.  Luckily a new toy jumped into my bag to use on them (and I will review that soon).


If you have an interest in wood, get down to the Dome at Sydney Olympic Park this weekend (27th-29th August) and check it all out for yourselves.

Sydney Timber and Working with Wood Show

Friday, 13 July 2012

The Tiger Moth Project

It started as an advert on a woodwork forum. Somebody was selling a piece of wood from a Tiger Moth wing spar. Now I am a Tiger Moth fan, I love them. I was lucky enough to spend a few hundred hours of flying these vintage aircraft and have very fond memories of them. I quickly replied to the advert but he had sold the wood, but he had more. the wood had been reclaimed during an overhaul of an aircraft and few fine cracks meant it was not air worthy. In fact the wood was the original spar from a machine built in the early 1940's as a trainer for the RAF. A few days later the wood arrived and I was excited, but how to combine my hobby with a past love. I wanted a pen, so that's what I made, one pen, for me, to keep. The wood is spruce and not inheritantly featured, so I thought why not get it laser engraved? If I was going to the bother of that I thought why not get some more done to sell, if they sell?
Sell they did! They guys at work were keen to own part of aviation History. In the end I made several batches and sold twenty pens. I was quite a happy little chappy. The pens are called Sierras though I also made some nice fountain pens for a friend too.
With so many pens out there mine was no longer unique so with some leg overwood I made a quick clock. The wood had some holes which were from how it was held within the frame. I madva quick decision to leaves these unfurled as it is part of the woods story. I can't wait now for a new desk to put my clock on.
I do still have a little wood left and am thinking what else to do to keep this wood alive.

Sunday, 8 July 2012

Bullet Pen Tutorial


Today I managed to get some study done for the up coming simulator check at work and rewarded myself with some shed time.  I was after a quick project, so a pen was the perfect idea!  This is only the second Bullet pen I have made but they are so easy and quick I couldn't resist.

First is to pick a timber to match the kit.  This is a Gold Bullet from Carroll's woodcraft supplies and needed something rich to go with it.  I know nothing about guns, but I do have friends that do and they told me Walnut is often used in the stock.  A rummage through my blank supply turned up some walnut (good result),


I always lay out the kit and bushing before starting to check the parts are all there. 


The next step is to cut the wood to the correct size for the brass tube and drill the whole.  Its best to cut the blank a few mm to long at each end.  This pen requires an 8mm drill bit (each pen type is different).


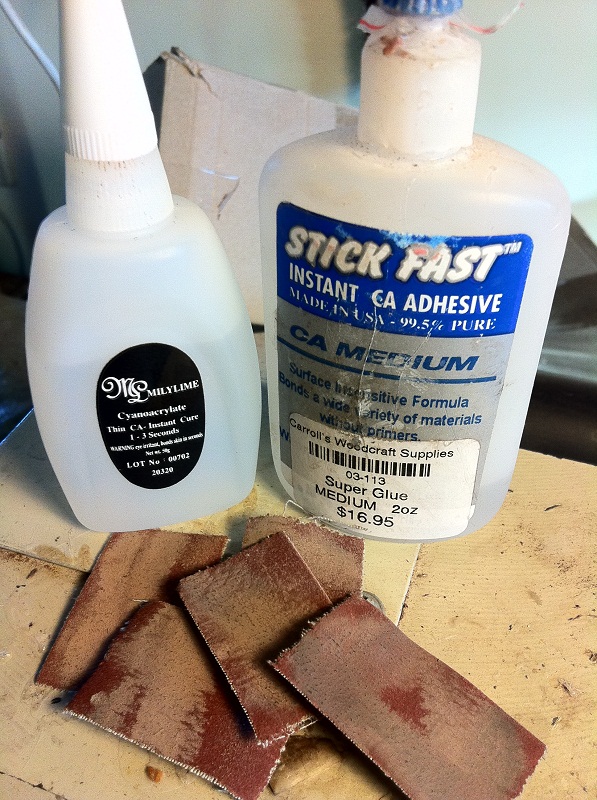
Next is to check the tube fits the blank OK.  If the fit is tight then I rough the edges of the tube with some sandpaper before gluing.  There is a lot of different ways to glue the tube in, all seem to work.  My usual method is to run some Medium CA glue into the blank, then a line onto the tube.  I then insert the tube into the blank whilst turning it to spread the glue.  I have learnt to wear rubber gloves when doing this as I am a cluts and have glues a few fingers together.  Usually when I am gluing I do a whole batch of pens at the same time.  The pen now needs time to dry, for me I generally leave them over night but for medium CA a few hours is plenty.


As the blank has been cut a bit long it is important to use a barrel trimmer to square of the edges so the pen kit has a great fit.  You can use a sander to do this, its just important to make sure the edges are square.


Now comes the fun part, time to turn!  Fit the bushes to the blank and then place on a pen mandrel.  You can knock the edges of the blank before turning and when using acrylics I often do, but this time I didn't.


I like to use a spindle gouge to turn do to the correct shape before finishing with a Skew


 Create the shape you want, for a Bullet I keep it fairly straight between the bushes leaving it a little proud.  To get the wood down to the correct size I sand it to the bushes starting at 150 grit moving up to 1500 grit sandpaper. Next it is important to remove any dust with a quick zap of air from the compressor.

You should now have a smooth bit of wood, now time to finish.  There are lots of finishes you can use and it depends on what you will use the pen for.  For a durable but good finish I like CA adhesive (super glue).  I use a few layers of medium to fill any dent in the wood grain.  I run a small bead across the top and use the back of the sanding paper to smooth with the lathe spinning.  Once this has been allowed to dry I use 0000 steel wool to smooth of the ridges before applying the thin CA.  How many coats?  Good question, depends on taste.  Some people go 20 coats or more, and the more you go the thicker the finish.  I prefer about 10 thin coats doing five then letting it dry then another 5.  With the lathe spinning at 500 rpm, even holding the glue on for a second will give many thin layers.


Now that the glue has been applied I let it dry then its time to polish.  I use micro mesh sanding pads.  I wet sand with those and then use Brasso to get out any fine marks and give it a final hit with car polish to make it pop.  Then its assembly time.


This is one of the easiest kits to put together, just screw the transmission into the body.  Squeeze the cap onto the body you have just made, be careful not to crack the body.  The last job is to push the two halves together.  Looks pretty good when finished!


If you like my pens why not check out my etsy store http://www.etsy.com/shop/sameliasdad
Use the coupon code BULLET for free postage for a limited time only.