Showing posts with label lathe. Show all posts

Thursday, 17 January 2013

Beginnings


As I sit at my parents house pining for my workshop I have got to thinking about my woody beginnings.  I’m not really talking my poor attempts at high school woodwork, but my first attempts at a new found hobby.
IMGP2048
This was it, not really inspiring.  I just put a peace of scrap pine between centres, spun up the lathe and with no knowledge of what each tool did, speed changes, or what was safe.  This was it, tear outs galore, no objective shape, but about 20cm of pure joy.  I still have it hidden away in a box somewhere.
I soon wanted to investigate more.
PB020372
This was my first bowl.  It was made of layers or scrap pine stuck together (pine is very under-rated).  It has thick walls where I was too scared to go too thin and lots of chips and tears.  Again it was a work of enjoyment.  Now I would be horrified to produce something, how shall I put it, rustic?  Also turning wood has made me a better photographer, these early shots are not so well composed, or even focused.
goddess 020
And finally my first pen.  This was a slimline made from, I don’t know what……wood.  Its turned too thin, the ends are undersized and it looks a little wrong, but I still use it today.
Of course these are all learning experiences.  With each creation comes knowledge, and enjoyment.  I am happy to look back at where I came from, and compare to the things I turn now, and it always makes me smile.  I wonder what my old woodwork teacher would think of what i am doing now?
What was the first thing you made?

Monday, 14 January 2013

MC900 Wood Lathe


A while ago I talked about my very first wood lathe, well today I shall talk about my current wood lathe.  After a year with my ebay lathe I decided the bug had taken hold and it was time to upgrade.  A little research and I settled on the MC900 form Carbatec.   The reason for my choice, availability (they were in stock and only an 90 minute drive away) and they were within my small budget.
DSCN2228
One point first of all, it is heavy and is a two person lift.  This was frustrating when I got home waiting for someone to help me lift it out of the box and bolt to the bench (which I had newly constructed for the purpose). 
OK so onto the actual review.  The MC900 seems to be available with a variety of different badge names, but presumably roll out of the same factory in China.  I will state now you get what you pay for, and at $497 it is at the budget end of the market.  It is not as smooth as a Nova or Wood fast or higher end lathe.  It can be noisy and the drive belt is a little rattly in sound though doesn't slip. 
029
I like the variable speed handle on the front giving a range of speed selections from 500RPM through to 2000RPM.  However, the minimum of 500RPM can be too fast some projects, especially heavy objects that aren’t balanced.  In fact I did have a big lump of red gum on there that I nearly shock the house down before I could press stop.  This lack of a really slow speed I find a shortfall, however for most of my turning, mainly pens and already round bowl blanks it does the job easily.
028
The variable speed drive worked nice and smooth on purchase, but now three years down the track it is a little stiff to change down speeds even with a little TLC and preventative maintenance (I expect I will need to replace the drive belt soon).
It is certainly a sturdy cast iron construction, although the legs supplied do look a little flimsy and may require some additional bracing.
031
I was seduced by the rotating headstock for bigger items, but if truth be known I have used it twice, neither time I was comfortable with.  The head is easy to turn, just release two nuts and has three positions.  The lathe comes with an extension Banjo for outrigger turning but it never seems to fit in the correct spot.  The tool rest also is a little chunky for small turnings and you cant always get close enough for thin objects (a definite downfall for making pens).  In addition the tool rest is a little long again getting close to the headstock spindle and tailstock for short barrel pens.  The position of the drive motor is also not ideal, it is close to the dust and can get in the way of some bits of wood when using a small face plate.
027
Although a nice solid construction I have found that the friction nuts below the banjo and tail stock do become a little loose and are hard to access to tighten whilst mounted to the bench. There are a few things I wish it did have. Firstly a lockable and index able headstock, for ease of chuck change and allow more intricate work. Secondly a hand wheel on the headstock so that it is easier to turn the spindle to rotate the work piece.
So am I happy with my Lathe?  Yes.  It was the right lathe for me at the time and price, and will continue to cover my needs for the foreseeable future.

Saturday, 3 November 2012

In the Beginning

In the beginning there was a yearning, a need for something creative, a need for a hobby, a need for something for me.  I had always had an interest in wood (i think I've said that before) but I needed a push.  My wife had been nagging me to get a hobby, but I had been putting it off. It was only after a trip to Tassie that I caught the bug (and it is a bug).  A trip to Strahan where I watched an experienced man turning wood and I smelt the Huon got the heart fluttering.

On return from that family holiday I scoured eBay looking for wood lathes.  Everyday I would log on and see what was new out there, but they all seemed expensive.  I didn't want to spend a lot of money, I didn't know if I would enjoy it, or be any good at it.  Then one day it was there.  It wasn't a great looking lathe.  It was a fairly common Chinese made lathe that seems to have been produced for GMC, Ryobi, Dynalink and many, many more (mine was Brook Crompton).


It was very simple.  Four speeds changed by a pulley, with a disc sander on the back of the headstock.  I loved this lathe for two reasons, it was local and came with some tools, plus it was cheap, I guess that's three things.


I paid about $150 for it which I thought was good, especially when I found it came with three Robert Sorby tools as well as a pack of cheap tools.  All I needed to learn and practise.  I bought some cheap pine to play with and I was off and running.


This was my first effort, its abstract but I just wanted to combine steel with wood and make shavings.
After a few months I had realised the limitations of the lathe without a chuck and bought one of those (I will review that later). Then it was a pen mandrel, and lots of pen parts!  But I needed to upgrade and after twelve months I did (I will review that to sometime).  This old machine went back on EBay, and sold minus a few of the tools for $100.  All in all I had found a hobby and a passion all for the bargain price of $50, I love bargain!

What was your first wood working toy?


Sunday, 8 July 2012

Bullet Pen Tutorial


Today I managed to get some study done for the up coming simulator check at work and rewarded myself with some shed time.  I was after a quick project, so a pen was the perfect idea!  This is only the second Bullet pen I have made but they are so easy and quick I couldn't resist.

First is to pick a timber to match the kit.  This is a Gold Bullet from Carroll's woodcraft supplies and needed something rich to go with it.  I know nothing about guns, but I do have friends that do and they told me Walnut is often used in the stock.  A rummage through my blank supply turned up some walnut (good result),


I always lay out the kit and bushing before starting to check the parts are all there. 


The next step is to cut the wood to the correct size for the brass tube and drill the whole.  Its best to cut the blank a few mm to long at each end.  This pen requires an 8mm drill bit (each pen type is different).


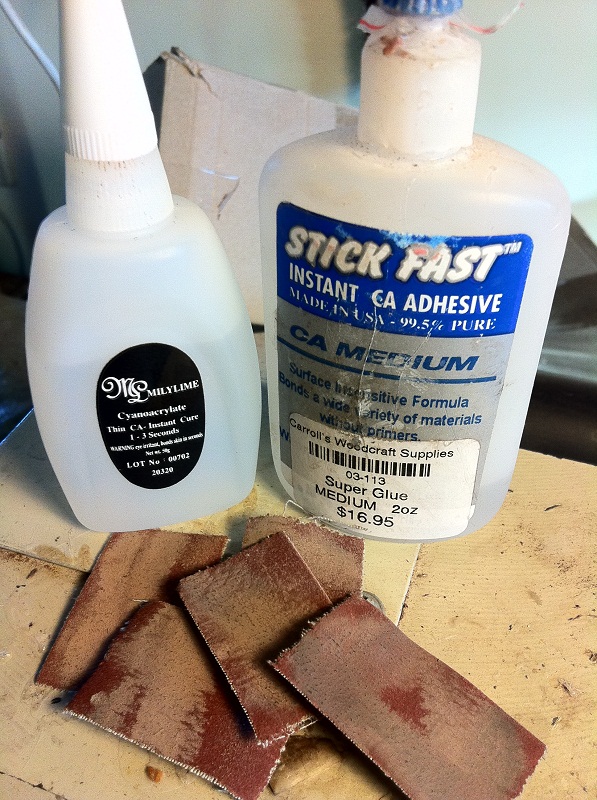
Next is to check the tube fits the blank OK.  If the fit is tight then I rough the edges of the tube with some sandpaper before gluing.  There is a lot of different ways to glue the tube in, all seem to work.  My usual method is to run some Medium CA glue into the blank, then a line onto the tube.  I then insert the tube into the blank whilst turning it to spread the glue.  I have learnt to wear rubber gloves when doing this as I am a cluts and have glues a few fingers together.  Usually when I am gluing I do a whole batch of pens at the same time.  The pen now needs time to dry, for me I generally leave them over night but for medium CA a few hours is plenty.


As the blank has been cut a bit long it is important to use a barrel trimmer to square of the edges so the pen kit has a great fit.  You can use a sander to do this, its just important to make sure the edges are square.


Now comes the fun part, time to turn!  Fit the bushes to the blank and then place on a pen mandrel.  You can knock the edges of the blank before turning and when using acrylics I often do, but this time I didn't.


I like to use a spindle gouge to turn do to the correct shape before finishing with a Skew


 Create the shape you want, for a Bullet I keep it fairly straight between the bushes leaving it a little proud.  To get the wood down to the correct size I sand it to the bushes starting at 150 grit moving up to 1500 grit sandpaper. Next it is important to remove any dust with a quick zap of air from the compressor.
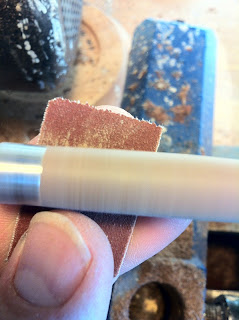

You should now have a smooth bit of wood, now time to finish.  There are lots of finishes you can use and it depends on what you will use the pen for.  For a durable but good finish I like CA adhesive (super glue).  I use a few layers of medium to fill any dent in the wood grain.  I run a small bead across the top and use the back of the sanding paper to smooth with the lathe spinning.  Once this has been allowed to dry I use 0000 steel wool to smooth of the ridges before applying the thin CA.  How many coats?  Good question, depends on taste.  Some people go 20 coats or more, and the more you go the thicker the finish.  I prefer about 10 thin coats doing five then letting it dry then another 5.  With the lathe spinning at 500 rpm, even holding the glue on for a second will give many thin layers.


Now that the glue has been applied I let it dry then its time to polish.  I use micro mesh sanding pads.  I wet sand with those and then use Brasso to get out any fine marks and give it a final hit with car polish to make it pop.  Then its assembly time.


This is one of the easiest kits to put together, just screw the transmission into the body.  Squeeze the cap onto the body you have just made, be careful not to crack the body.  The last job is to push the two halves together.  Looks pretty good when finished!


If you like my pens why not check out my etsy store http://www.etsy.com/shop/sameliasdad
Use the coupon code BULLET for free postage for a limited time only.